
| Prev | TOC | Next |
After the account has been set up, ePNJPOS needs to downloaded, installed, and activated on PC’s for use. Each PC that ePNJPOS will be installed to requires its own terminal set up in the account.
To begin the process, click the Download button at the bottom of main ePNJPOS Config screen.
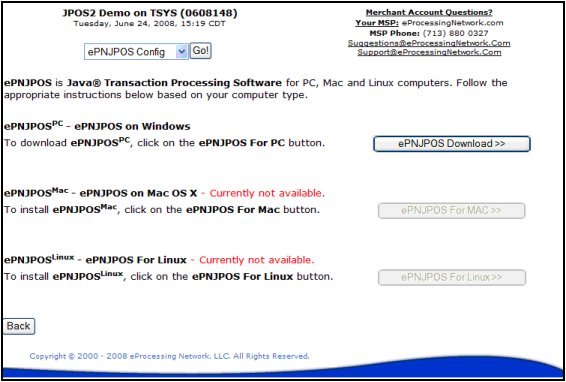
Figure 5–1 ePNJPOS Download Page
Install ePNJPOS to your system by clicking on the ePNJPOS Download button shown above in Figure 1. You will be presented with the following, or similar, dialog box shown below.
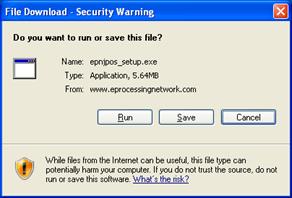
Figure 5–2 File Download Prompt
Check the Save to Disk option then click OK.
Locate the downloaded file on your computer. And double click the epnjpos_setup.exe file.
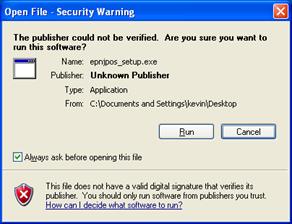
Figure 5–3 Open File Prompt
Click the Run button.
The ePNJPOS - InstallShield Wizard window opens.
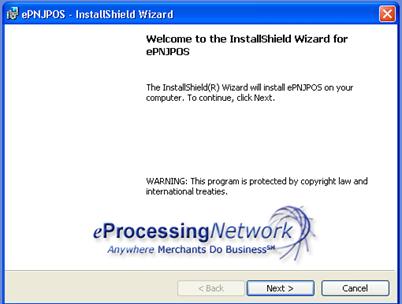
Figure 5–4 Install Screen 1
Click the Next button and the ePNJPOS Installation Wizard Customer Information Entry dialog box will appear.
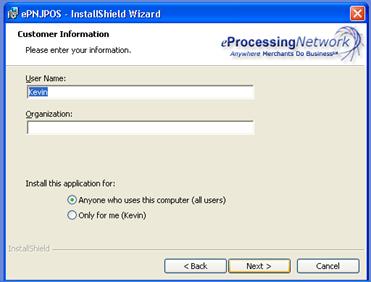
Figure 5–5 Customer Information Entry Form
Enter your User Name and Organization, and select whether you would like to install ePNJPOS for anyone who uses the computer, or just for yourself.
Click Next. You will be presented with the Destination Folder dialog. Click Next to accept the default destination folder.

Figure 5–6 Install Destination
After clicking Next in the Destination Folder dialog box, you will be presented with the Installation Summary dialog box shown below in Figure 7. Click the Install button.
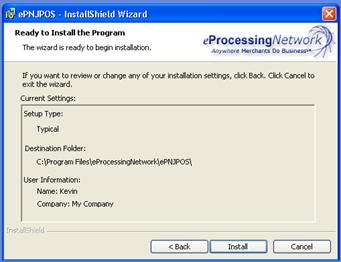
Figure 5–7 Installation Summary
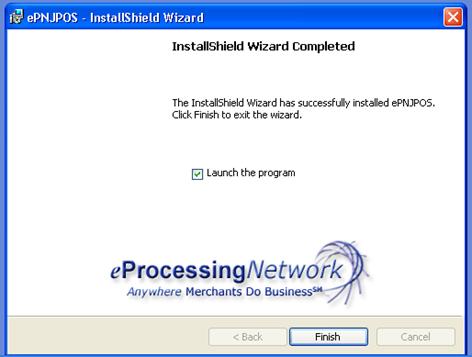
Figure 5–8 Installation Complete
When installation has been completed, you will be presented with the Installation Wizard Completed dialog box. The option “Launch the program” is already selected for you. Click Finish to exit the ePNJPOS Installation program.
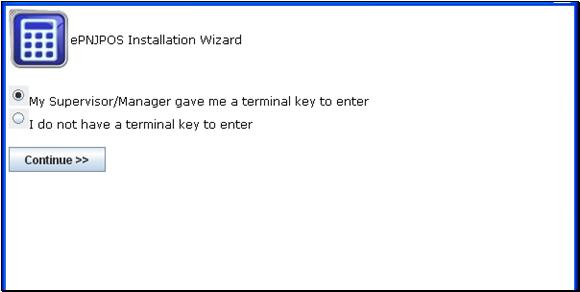
Figure 5–9 Activation Wizard – With Terminal key
Select the option that fits your situation. For this video/section, we will be following the default option, "My Supervisor/Manager gave me a terminal key to enter". Click the Continue>> button.
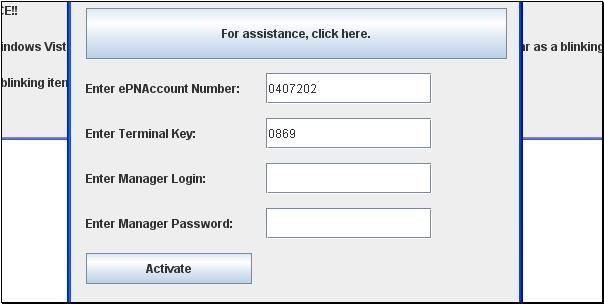
Figure 5–10 Activation Wizard – With Terminal key
Enter the ePNAccount Number, the terminal key and Login/Password that was provided by your Supervisor/Manager. Click the Activate button.
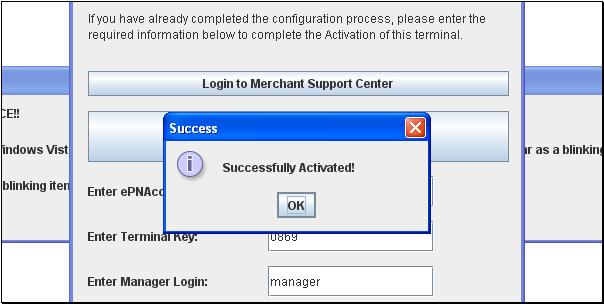
Figure 5–11 Activation Wizard – With Terminal key
Now you have been Successfully Activated.
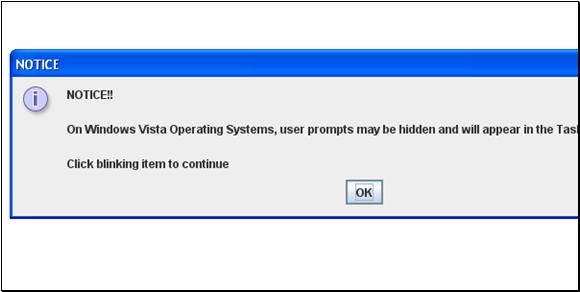
Figure 5–12 Activation Wizard – With Terminal key
This is a notice for Vista operating system users. If you are not on a Vista computer, you can ignore this Notice.
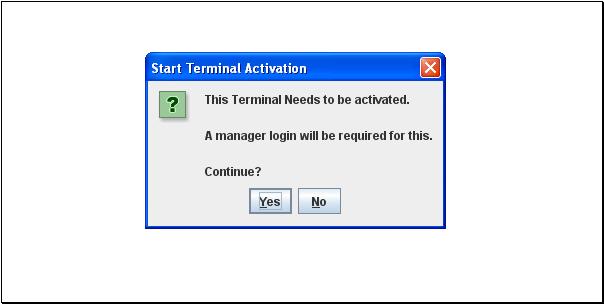
Figure 5–13 Activation Wizard – No Terminal key
Click the Yes button to start Terminal Activation.
Click the No button complete the Terminal Activation later. You can start this process later by clicking the desktop icon for the ePNJPOS.
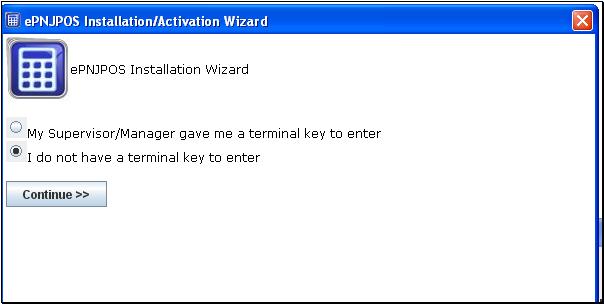
Figure 5–14 Activation Wizard – No Terminal key
Select the option that fits your situation. For this video/section, we will be following the default option,
"I do not have a terminal key to enter".
Click the Continue>> button.
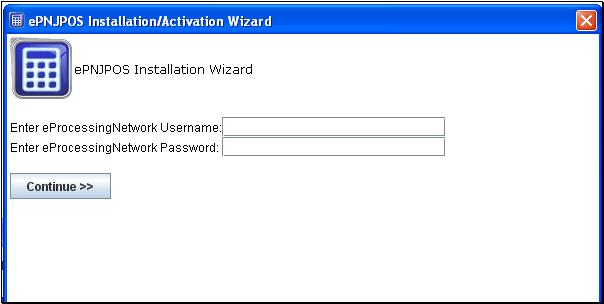
Figure 5–15 Activation Wizard – No Terminal key
Enter your ePNAccount information. This the same information you would use when logging in to the Merchant Support Center at www.eprocessingnetwork.com.
Then click the Continue>> button.

Figure 5–16 Activation Wizard – No Terminal key
The first terminal has been created for you.
You can rename it or leave as the default name.
The terminal is already set to accept credit card transactions.
Will you be accepting Debit Transactions?
Check mark the box if so, leave uncheck if not.
Will you be accepting Check Transactions?
Check mark the box if so, leave uncheck if not.
Will you be accepting Cash Transactions?
Check mark the box if so, leave uncheck if not.
Will you be accepting Using the Signature Capture feature using the Ingenico i6550?
Check mark the box if so, leave uncheck if not.
Click the Continue>> button.
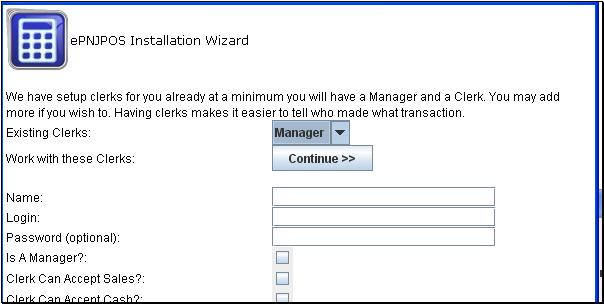
Figure 5–17 Activation Wizard – No Terminal key
The initial Manger/Clerk Login has been created. The manager login is used to activate the ePNJPOS and access configuration & settings for the software. The initial manger login is set with out a password but can be added later. If you do not have multiple employees, you can click the Continue>> button to complete the activation.
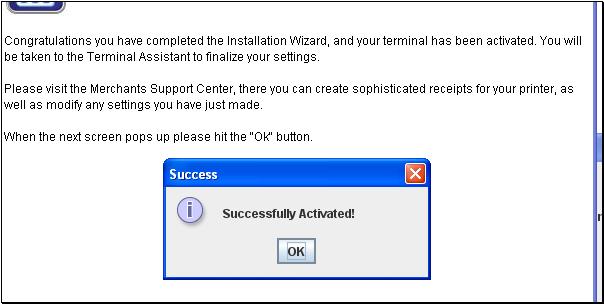
Figure 5–18 Activation Wizard – No Terminal key
Click the OK button.
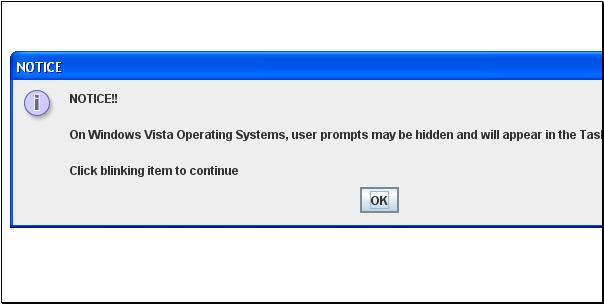
Figure 5–19 Activation Wizard – No Terminal key
This is a notice for Vista operating system users. If you are not on a Vista computer, you can ignore this Notice.
On first run ePNJPOS will start the activation wizard. This will register ePNJPOS as a terminal on the account.
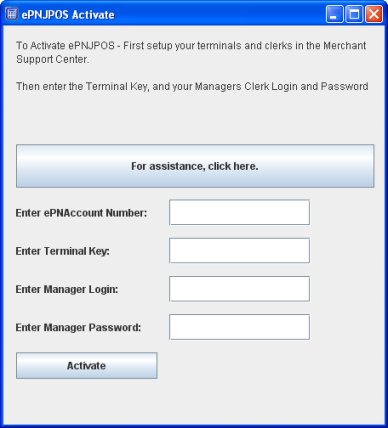
Figure 5–9 Activation
All information must be provided to successfully register the terminal.
Click the Activate button to complete activation.